Kelli !! my Sistah...( SOC)this one is for You!!. I Hope that you like my "little Tutorial".. I do have a video camera.. ( my Little Flip) and will hopefully get up the courage to put a video together, But for NOW I hope that you can find this useful. . OR at least I can show you how I color my images. Thank you for always encouraging me.
HUGS!!!
Hi everyone.. I hope you are ALL enjoying your day.. I have had the last two days off; truly have, enjoyed mine. Yesterday was my errands and clean up day.. Today was my day just to "Relax" and enjoy.
It was also my day that I used to finish up my Post and Tutorial for you ALL today.
I have been asked "MANY" times about my coloring technique and what I used for my Skin tones. I would LOVE to do a video, but seeing that I have NOT done one before and am soo Nervous in doing one, I thought that I would take "baby steps" and start with a "Pictorial Tutorial "
So just be prepared that this is a very Lengthy post.
So let me first start of by "Saying" I do NOT own any Copic markers. I love seeing how talented SOO many people are with them, and may be one day I will not only own them but take some classes on how to use them. For my coloring I use "
Prisma Pencils" and
OMS (Oder less Mineral Spirits) I started off with the open pack from Michael's and then was lucky enough to win a 120 set from Ebay for $60.00
I missed one Important item on this Pic.. (see even in Pics my nerves gets the best of me.. LOL) YOU will need an "emery" board or Nail file. ( I get the ones from the .99 cents store with 2 per pack) you will use that to clean your stumps once your done with them.
Here is what I use to start with.. My Pencils for skin tones:
1080 Beige Sienna,
945 Sienna Brown,
946 Dark Brown, and the other day I discovered that my
944 Terra Cotta gives me a nice. Cocoa complexion too. My Oder less Mineral Spirits ( they come in many different name, Mine is the Mona Lisa Brand that I get from Michael's. I used a little baby food jar, and a small piece of sponge, and just fill a very small amount in the bottom of the jar to use as I need. Next are my "Paper Stump" which is used to blend my colors with the OMS. I just dip the end into my jar to pick up a little of the OMS and start to blend. I have my eraser too. And of course I could not do a good Skin Tutorial with out using "one" of my Favorite Stamp Co. I used 3 Images from the Miss Anya
Collection
First Tip: A little goes a LONG way.
Second Tip: always have a good clean eraser as needed to clean up your colors. I prefer the plastic ones they are great in not leaving those ugly dark streaks. ( you will see as I go along)
I start with my 1080 Beige Sienna.. starting with small circular motion I color all my images. ( I usually start with the face, and then work my way down to the chest, arm, legs or body.
Third tip: the pressure in your coloring will determine how light or dark your images turn out. So that is how I have been practicing my skin, if I want a lighter skin tone, then I tend to use "less pressure" and if I want a darker skin tone then I use more pressure and go a little heavier with laying down my colors.
So this is what she looks like after laying down my first color. As you can see I don't color every thing because, NO matter how light or dark your skin is, we still have areas where our light source hit us, and that's mainly in our face right around our "forehead, nose, top of cheeks and top of lips (even though Anya doesn't have any lol

Using my paper stump, dipped into my OMS. I start the same way as I did with my pencils, and again using "small circular motion I start to blend in my colors.. I tend to start an the corner and blend all the way out to the middle of her face. and Just continue that until I get all my colors blended. The OMS really is great for melting the wax in your pencils so that you can really blend your colors well. You continue to blend with the "same" stump until your "paper stump begins to dry and you can tell because it start to squeak on your card stock. ( I have to admit that I have seen some Artist that do NOT even use the OMS, but can blend their colors soo
Beautifully. I am no where there yet so thank goodness for OMS. ( I colored only the face first so that you can see what I am talking about better)
Fourth Tip: Do NOT over saturate your stump just dip the tip all the way in, You can even use a little scrap paper next to you to dip off the excess if you need to. Again even though I didn't show it on my Supplies Pic. Use your nail file to clean of your stumps if the colors do become too build up. but I do Not change or have to clean too much when doing my skin tones because all the colors are going to be blending together any ways.
This is what she looks like after I have blended and layered my first color (I didn't mean to crop it soo close)
No my next color is 945 "Sienna Brown".. this is such a gorgeous color.. As you can see my pencils are at the "half way mark, its good because it shows how much LOVE I have for them, and considering that I have had them for over 2 years now, I think they are doing pretty good. ( I do have 2 945 in my Pencil bucket so I do use both of them, just which ever one I grab first.)
Again nothing has changed I layer it the Same exact way.. I do go a lot closer to the edge of the lines because we are a lot darker the closer in especially under our hair lines. Then using my same stump I collect more OMS with my stump and over my images, keeping my circles "very close together" so that I can get a great even layer.
So here is she after I have layered my 2nd color. You can see that she really has come together nicely, her skin looks gorgeous.
My Third and last color is 946 "Dark Brown". Now I only use this just for my Shadows and darker areas where there is No light. I do NOT use my circles any more instead I just "kinda trace the lines under her hair, under her neck, where her shirt lays, and the outer part of her arms and elbows and legs.
Fifth Tip: For this last layer Do NOT use the circles.I trace along the lines that have shadows and where there is no light source. These are the areas: Under her Hair line, under her Chin, Where here shirt lays, The outer part of her arm and elbows and legs.
With my stumps, I don't really need to dip. (Unless it has dried up, But you only need a little for this step) my stump, as I only go up and down with out pulling my colors too far out, as I am don't want it to cover the Whole area. She is Finished.
Sixth Tip: You can continue to BLEND and Blend with your colored Pencils and OMS until you get the desired Look that YOU are looking for. Sometimes I will color an image and the next day I may see areas where I missed, or wanted to add or lighten and I just grabbed my pencils. and some OMS and fix where I feel I need too.
OK.. So now for this next Image I am going to goo through it pretty quickly because I don't want to run on and on.. I did this image a lot darker, by just going darker with my 1080 and my 945. Wanted to show you how I use the same 2 Pencils to create another skin tone, buy just applying more color and pressure to my image.
1080 Beige Sienna going a littler darker. (I could have layered more colors coming down a little on her forehead.)
My 945 Sienna Brown again going a little darker.
Here is.. I blended my 945 and then add my 946 to all her darker areas. Now if you can see I have some brown that ran over the lines to her hair, (that happens with the paper stump).
Her she is Blended with ALL 3 colors.
Seventh Tip: This is when I used my eraser to clean up any colors that went out side the lines.
****** Your image will ALWAYS appear a Little Darker when you first color, because it is still wet from the OMS. It will Dry and You will see that sometimes it does lighten up, But again you can go back with your lightest color again and adding the second color. For my paper stump, I dip it so slightly and even go light with my blending so that I don't pick up too much of the color I have already laid down.
For my last Image I came across this color when I picked it up instead of my 945, as I had already laid down my first color. But after I saw it I really LIKED IT... and just kept it.
for Miss Anya Summer" I used 1080,(for my under tones), 944 "Terra Cotta" ( For her Skin complexion) and 945 Sienna Brown for the dark shadows . I don't really know what I call it, but I think she really has a Gorgeous Skin complexion.
So after you have seen and read all of that.. I REALLY HOPE that I gave you a "good or at least "do able" Tutorial...... I can never say, that I came up with all of this by my self, as I have only been doing this for the last few years. So I like you all watched a LOT of YouTube videos, Stalk "hundreds of blog" LOL.. don't laugh. "Your included". I just Practiced and practiced and am still practicing, No matter how much you can learn from someone, I still try to take a little bit from every where and try to make it mine in what works for me.
Speaking of Stalking, I saw a Great Tutorial on TGF Blog where the DT member showed how to make a Set of cards very simple and in sort of an "assembly line".. She made 3 cards soo Simple, Yet soo Gorgeous. Went perfect for my 3 little ladies here.
Miss Anya Summer. DP from Echo Park "Splash" she used doiles in her Tutorial,, I didn't have any, but I did have some very cute Tags, from MS that looked like doiles. (again make it your own!!!.
Just added some embllishments and done..... NEXT!!!!>>>>>>
(Going back to my Skin Tut: I went back over her with my 1080. over some areas in her face and her legs.. I DID NOT use any OMS. as I went very lightly with my pencil. I think she came out Beautiful.) She is a little darker that the picture shows.
Miss Anya Collection. She is ONE of my favorite image, love her hair. Card Base is Bazzil, DP is from My Mind Eyes "Vanity Fair". I added some glitter to her bow.
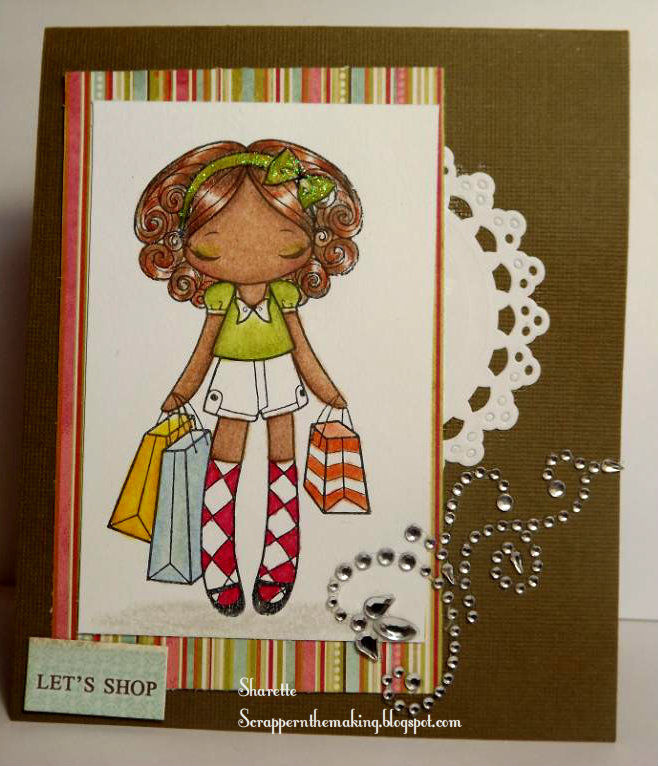
LOVE this image too Miss Anya Collection. Love her Bright colors, I can only use my yellow for a few more weeks.. So I will be doing lots more coloring with them. DP is from MME' Miss Caroline collection. "Dolled Up". Sentiment and Sticker is from "Webster's page-Girl Land collection. LOVE it.
Here is the Set.. I really LOVE how they turned out, and soo glad that I made them.. OF course they are a set, So I will give them all together. Great Birthday gift. or Thank your gift.
I would really love some "feedback" on my "Little Tutorial" I want to know what you thought of it, good or bad, ( just be Nice-please!!:0)... And if it Help in any ways I want to here that too, if you have any questions please put that in the comment too.. I really "worked" hard on this and I hope that you saw "something" you like.
Happy Scrapping,